Mastering iPhone Photo Editing: Beyond Basic Adjustments
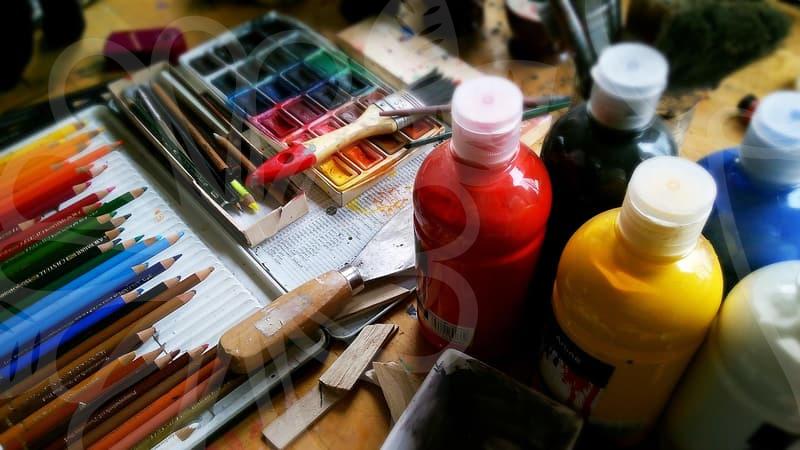
Understanding the nuances of iPhone photo editing can elevate your everyday snaps into something more professional. While the iPhone camera itself is remarkably capable, leveraging its editing tools, or even third-party applications, can make a significant difference. Many users, especially those who rely on their phones for content creation, often overlook the power of post-processing.
It’s easy to fall into the trap of thinking that just taking a good photo is enough. However, even subtle adjustments can drastically improve clarity, color, and overall impact. Think about it like this: a painter doesn’t just slap paint on a canvas; they meticulously blend colors and refine details. Similarly, your photos benefit from a thoughtful touch.
Why iPhone Photo Editing Matters More Than You Think
Many people assume that the iPhone’s built-in camera automatically handles all necessary adjustments, and for casual snapshots, this is often true. Features like Portrait Mode and Night Mode do a remarkable job. However, when you need your images to truly stand out, whether for social media, a blog, or even a personal portfolio, relying solely on automatic processing is like using a hammer for every job. You need the right tools for specific tasks.
Consider the common scenario of shooting in mixed lighting conditions. Even the best smartphone cameras can struggle to balance different light sources, leading to unnatural color casts or blown-out highlights. This is where manual editing comes in. A few minutes spent adjusting the white balance or selectively dodging and burning can rescue an otherwise mediocre photo.
Furthermore, understanding basic editing principles, such as the rule of thirds or leading lines, can be enhanced through post-production. You might not always be able to perfectly frame a shot in the moment, but cropping and straightening in the editing phase can salvage a composition. I’ve personally found that spending just five minutes on an edit can often make a photo 50% more appealing, a time investment that feels truly worthwhile.
Essential iPhone Photo Editing Adjustments: A Step-by-Step Breakdown
Let’s dive into the practical side of iPhone photo editing using the native Photos app. While professional software offers more granular control, the built-in tools are surprisingly powerful and readily accessible.
1. Exposure and Brightness: Setting the Foundation
This is where most editing begins. The ‘Exposure’ slider controls the overall brightness of the image. If your photo is too dark, increase it; if it’s too bright, decrease it. However, be cautious not to overdo it, as this can lead to a loss of detail in the highlights or shadows. The ‘Brightness’ slider offers a similar but often more localized adjustment.
For instance, if a subject’s face is slightly underexposed in an otherwise well-lit scene, you might use ‘Brightness’ to lift just that area without affecting the background significantly. I often find myself making these initial adjustments in increments of 5-10 points, observing the changes closely.
2. Contrast and Black Point: Adding Depth and Punch
‘Contrast’ affects the difference between the lightest and darkest areas. Increasing contrast can make an image ‘pop,’ but too much can make it look harsh. The ‘Black Point’ slider is crucial for defining the true black areas in your image, adding depth and preventing the shadows from appearing muddy or gray. Lowering the black point can add a dramatic feel, while raising it can recover detail in very dark areas.
A common mistake is to crank up contrast without considering the black point. This often results in a flat, washed-out look. Aim for a balanced contrast that defines shapes without crushing the shadows.
3. Saturation and Vibrance: Enhancing Colors Responsibly
‘Saturation’ boosts the intensity of all colors equally. ‘Vibrance,’ on the other hand, is smarter; it increases the intensity of muted colors more than already saturated ones, protecting skin tones from looking unnatural. For most edits, vibrance is the safer and more effective choice.
If you’re editing a landscape photo with vibrant foliage, a slight increase in vibrance can make those greens pop. However, if you’re editing a portrait, over-saturating can lead to unnatural skin tones. Always check your skin tones after adjusting these sliders. A common error is to push saturation too high, resulting in images that look gaudy rather than appealing.
4. White Balance and Tint: Correcting Color Casts
‘White Balance’ adjusts the overall color temperature of the image, making whites appear truly white. If your photo has a blueish cast (taken in cool light), you’ll want to warm it up. If it has a yellowish cast (taken under warm incandescent lights), you’ll want to cool it down. ‘Tint’ allows for fine-tuning of the green-magenta balance.
I recall editing a photo taken at a sunset that had an overly strong orange cast. By using the white balance tool to shift towards blue, I was able to neutralize the harshness while still preserving the warm sunset tones. This adjustment is often critical for making indoor photos look natural.
5. Sharpening and Noise Reduction: The Finishing Touches
‘Sharpening’ enhances edge detail, making textures more defined. Use it sparingly, as over-sharpening can create halos around objects and introduce artifacts. ‘Noise Reduction’ smooths out grainy or pixelated areas, typically found in photos shot in low light or at high ISO settings. Too much noise reduction can make an image look plastic and lose fine detail.
Finding the right balance here is key. A common mistake is to apply sharpening too aggressively, which can degrade image quality over time. For iPhone photos, which are already quite sharp, a subtle touch of sharpening is usually all that’s needed.
Trade-offs in iPhone Photo Editing: When Less is More
While the capabilities are impressive, it’s crucial to acknowledge the limitations and trade-offs. The native Photos app is powerful, but it’s not a substitute for professional desktop software like Adobe Lightroom or Photoshop when you need absolute precision or advanced retouching. For instance, removing complex objects from a background or performing intricate compositing is simply not feasible on an iPhone.
Another consideration is the time commitment. While basic edits can take seconds, achieving a truly polished look might require several minutes per photo. If you’re editing hundreds of images, this can add up significantly. This is where batch editing features in professional software or specialized mobile apps can offer an advantage in terms of efficiency.
The biggest trade-off is often the loss of original data when applying edits. While non-destructive editing is common in professional software, some operations on the iPhone might be more permanent. Always consider working on a copy of your photo if you’re unsure about an edit. It’s about knowing when the built-in tools are sufficient and when to consider alternative solutions, or simply accept the image as is.
For most everyday users and even many content creators, mastering the built-in iPhone editing tools is more than enough. It offers a fantastic balance of power and accessibility. However, if you find yourself constantly pushing the limits or needing very specific effects, exploring apps like VSCO, Snapseed, or Adobe Lightroom Mobile could be your next logical step. These often provide more creative control and advanced features for a small fee or even free.