Photoshop Work: Expert Editing Strategies
Mastering Photoshop Work: Professional Workflows
The bedrock of exceptional visual content creation often lies in mastering Photoshop work. For professionals and serious hobbyists alike, Photoshop is more than just a tool; it’s a comprehensive digital darkroom and a powerful illustration suite. Establishing efficient and robust workflows is paramount to producing high-quality results consistently and saving valuable time. Non-destructive editing techniques, such as using adjustment layers, smart objects, and layer masks, are not mere best practices but essential components of a professional workflow. These methods allow for flexibility, enabling revisions without permanently altering original pixel data. This ensures that your work remains editable and adaptable throughout the creative process and beyond, preventing costly rework.
Effective layer management is another critical aspect. Organizing layers with meaningful names, grouping related elements, and utilizing color-coding can dramatically improve navigation, especially in complex projects with dozens or even hundreds of layers. Smart objects are particularly transformative, allowing you to scale, rotate, and apply filters to an image or vector layer without degrading its quality. When you need to make changes, simply double-click the smart object to edit its contents, and the transformations will be reapplied to all instances. This approach minimizes the accumulation of artifacts and preserves the integrity of your source assets throughout intricate Photoshop work.
The Art of Precise Cut-Outs: Essential Photoshop Masking Techniques
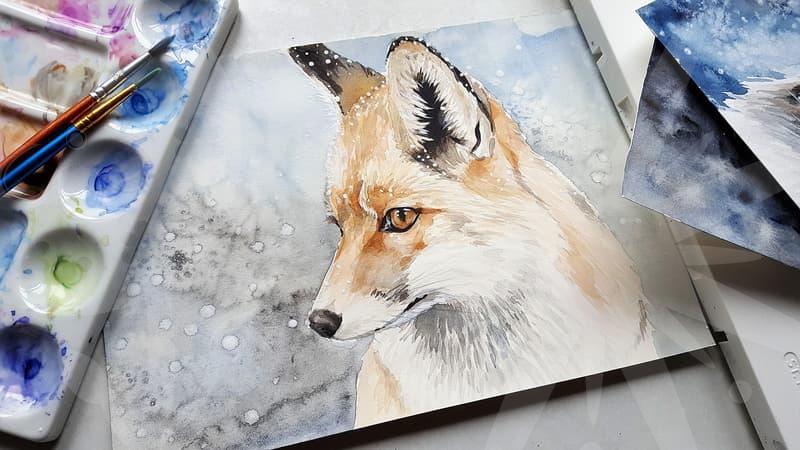
Achieving clean, professional-looking cut-outs, often referred to as ‘누끼작업’ (nu-kki-jak-eop) or masking, is a fundamental skill in Photoshop work. The ability to isolate subjects with precision is crucial for compositing, product photography, and graphic design. While there are multiple tools available, understanding their strengths and weaknesses allows for optimal application.
The Pen Tool remains the gold standard for creating sharp, defined edges, especially for hard-surfaced objects or clear outlines. It offers unparalleled control, enabling the creation of precise vector paths that can be converted into selections or masks. For more complex edges, such as hair or fur, the ‘Select and Mask’ workspace offers a suite of tools, including edge refinement brushes and color-aware selection algorithms. This dedicated environment is designed to tackle challenging selections that would be cumbersome with traditional methods alone. A common mistake is relying on a single tool for all masking tasks. Instead, a pragmatic approach involves combining methods. For instance, you might use the Pen Tool for the main body of a subject and then employ the ‘Select and Mask’ workspace to refine the finer details around the edges.
Step-by-step example for refining hair edges:
1. Begin by making an initial selection of the subject, perhaps using the Quick Selection Tool or Pen Tool.
2. Enter the ‘Select and Mask’ workspace.
3. Utilize the ‘Refine Edge Brush Tool’ to paint over the hair or fine edges. Photoshop analyzes the surrounding pixels to intelligently detect and select the hair strands.
4. Adjust the ‘Radius’ slider to control how much Photoshop analyzes for edge detail. A small radius is often best for hair.
5. Use the ‘Decontaminate Colors’ option to remove any color fringe from the background bleeding into the subject’s edges.
6. Output the selection as a Layer Mask for non-destructive editing.
Enhancing Image Quality: Transforming Low-Res to High-Res in Photoshop
One of the most frequent requests in image editing involves improving image quality, particularly upscaling lower-resolution images to higher ones without significant loss of detail or clarity. The impact of poor image quality—whether it’s pixelation, noise, or lack of sharpness—can lead to client rejection, poor user experience on websites, and an overall unprofessional presentation. In essence, the quality of your source material directly influences the perceived value of your final Photoshop output.
Photoshop offers several techniques to combat low image quality. Simple resampling using the ‘Bicubic Smoother’ option in the Image Size dialog can help enlarge images, but it’s often insufficient for dramatic increases in resolution. For more advanced enhancement, tools like ‘Smart Sharpen’ and ‘Unsharp Mask’ are indispensable for bringing out detail and improving perceived sharpness. Noise reduction filters can clean up grainy images, making them appear smoother and more professional. Increasingly, AI-powered features within Photoshop, such as ‘Super Zoom’ (if available in your version), leverage machine learning to intelligently add detail and upscale images with far greater fidelity than traditional algorithms. However, it’s crucial to understand the trade-off: aggressive upscaling can introduce artificial-looking artifacts or an overly smooth, plastic-like appearance. The goal is to enhance, not to create an image that looks obviously manipulated.
Cause and Effect of Image Quality:
* Cause: Low-resolution source image from a smartphone or older camera.
* Effect: Pixelation, blurriness, and lack of detail in final output.
* Result: Client dissatisfaction, rejection for print or high-definition display, reduced engagement on digital platforms.
* Mitigation: Utilizing advanced Photoshop features like AI upscaling, smart sharpening, and noise reduction, alongside careful manual adjustments, can mitigate these issues, though extreme cases may still be unrecoverable.
Bridging the Gap: Integrating Photoshop with Modern Design Tools
The landscape of design tools has evolved, and managing workflows between applications like Photoshop and modern platforms such as Figma has become a significant consideration in professional design. Historically, Photoshop’s .PSD format has been the industry standard for raster image editing and complex compositions. However, transferring assets from .PSD files to vector-based UI/UX design tools can present challenges.
For instance, extracting individual icons or elements from a complex Photoshop file might involve manually opening the PSD, selecting layers, and exporting them one by one. If the PSD contains rasterized elements or specific layer styles that don’t translate well to vector environments, the process becomes even more cumbersome. Tools like Figma are excellent for UI design, but they don’t possess Photoshop’s depth for detailed raster image manipulation or complex photo retouching. The reference content mentions services attempting to simplify this by offering Figma-specific templates and reducing the hassle of PSD conversion. This highlights a key trade-off: while Photoshop remains unparalleled for detailed image editing, its integration into streamlined vector-based workflows can require extra steps or specialized plugins. Understanding these limitations and exploring efficient export strategies—such as using Photoshop’s ‘Export As’ feature with appropriate settings or leveraging plugins designed for asset extraction—is vital for modern Photoshop workflows.
Common Photoshop Pitfalls and How to Sidestep Them
Even experienced professionals can fall into common traps during their creative process. One prevalent issue is destructive editing – making permanent changes directly to the background layer or rasterized layers without the possibility of rollback. This approach quickly limits future editing flexibility and can be a source of significant frustration when a project needs adjustments later.
Another common mistake is ignoring color spaces. Working in the wrong color space (e.g., CMYK for web design, or RGB for print without proper conversion) can lead to drastically different and undesirable color shifts in the final output. For web content, always ensure you are working in an appropriate RGB profile, such as sRGB. For print, Adobe RGB or specific CMYK profiles are necessary, with careful soft-proofing. Over-editing is also a significant pitfall; images that are too heavily retouched, oversaturated, or unnaturally smoothed often lose their authenticity and impact. The goal in professional Photoshop work should be enhancement, not artificial transformation. Finally, choosing the wrong file format for export can diminish quality or increase file size unnecessarily. For web use, JPEGs for photographs, PNGs for graphics with transparency, and SVGs for scalable vector elements are standard. Saving complex layered work as a flat JPEG when future edits are anticipated is a costly error.
Who Benefits Most from Mastering Photoshop Work?
Mastering Photoshop work offers tangible advantages to a specific group of professionals. Digital artists, graphic designers, photographers, and marketing content creators are among those who gain the most from developing advanced Photoshop skills. These individuals rely on the software to bring their visions to life, whether it’s retouching wedding photography to perfection, creating compelling marketing visuals for a new product launch, or illustrating intricate characters for a game.
The practical application of Photoshop is vast, ranging from high-end photo manipulation to creating detailed digital paintings or designing eye-catching social media graphics. For example, a photographer might spend 2-4 hours per client session applying consistent color grading and retouching to a set of 50 images. This level of detail and customization is what sets professional Photoshop work apart. The primary benefit lies in the ability to produce unique, polished, and impactful visuals that command attention and meet client expectations.
However, it’s important to acknowledge a significant trade-off: Photoshop is a subscription-based software, and its complexity means a substantial time investment is required to become proficient. For users with simpler needs, like basic photo cropping or quick social media edits, alternative, often free, tools like PIXLR or mobile editing apps might suffice. But for those who require deep control, advanced features, and the ability to tackle any image editing challenge, Photoshop remains the industry-standard solution. To begin leveraging Photoshop effectively, ensure you have high-quality source images and a clear understanding of your project’s end goal, whether it’s for print, web, or broadcast.
This approach is not ideal for tasks that are purely vector-based from the outset, where tools like Adobe Illustrator or Figma might offer a more direct workflow. However, even in such cases, Photoshop often plays a complementary role in asset creation or raster effects.